![[Updated December 2022] How to Install YOLOv5 [Object Detection Tool]](https://www.stg.tankobucreate.com/wp-content/uploads/2022/02/YOLO.jpg)
What is YOLOv5?
YOLO is an object detection algorithm. The name stands for You Only Look Once.
It differs somewhat from object tracking: it detects objects and identifies what they are.
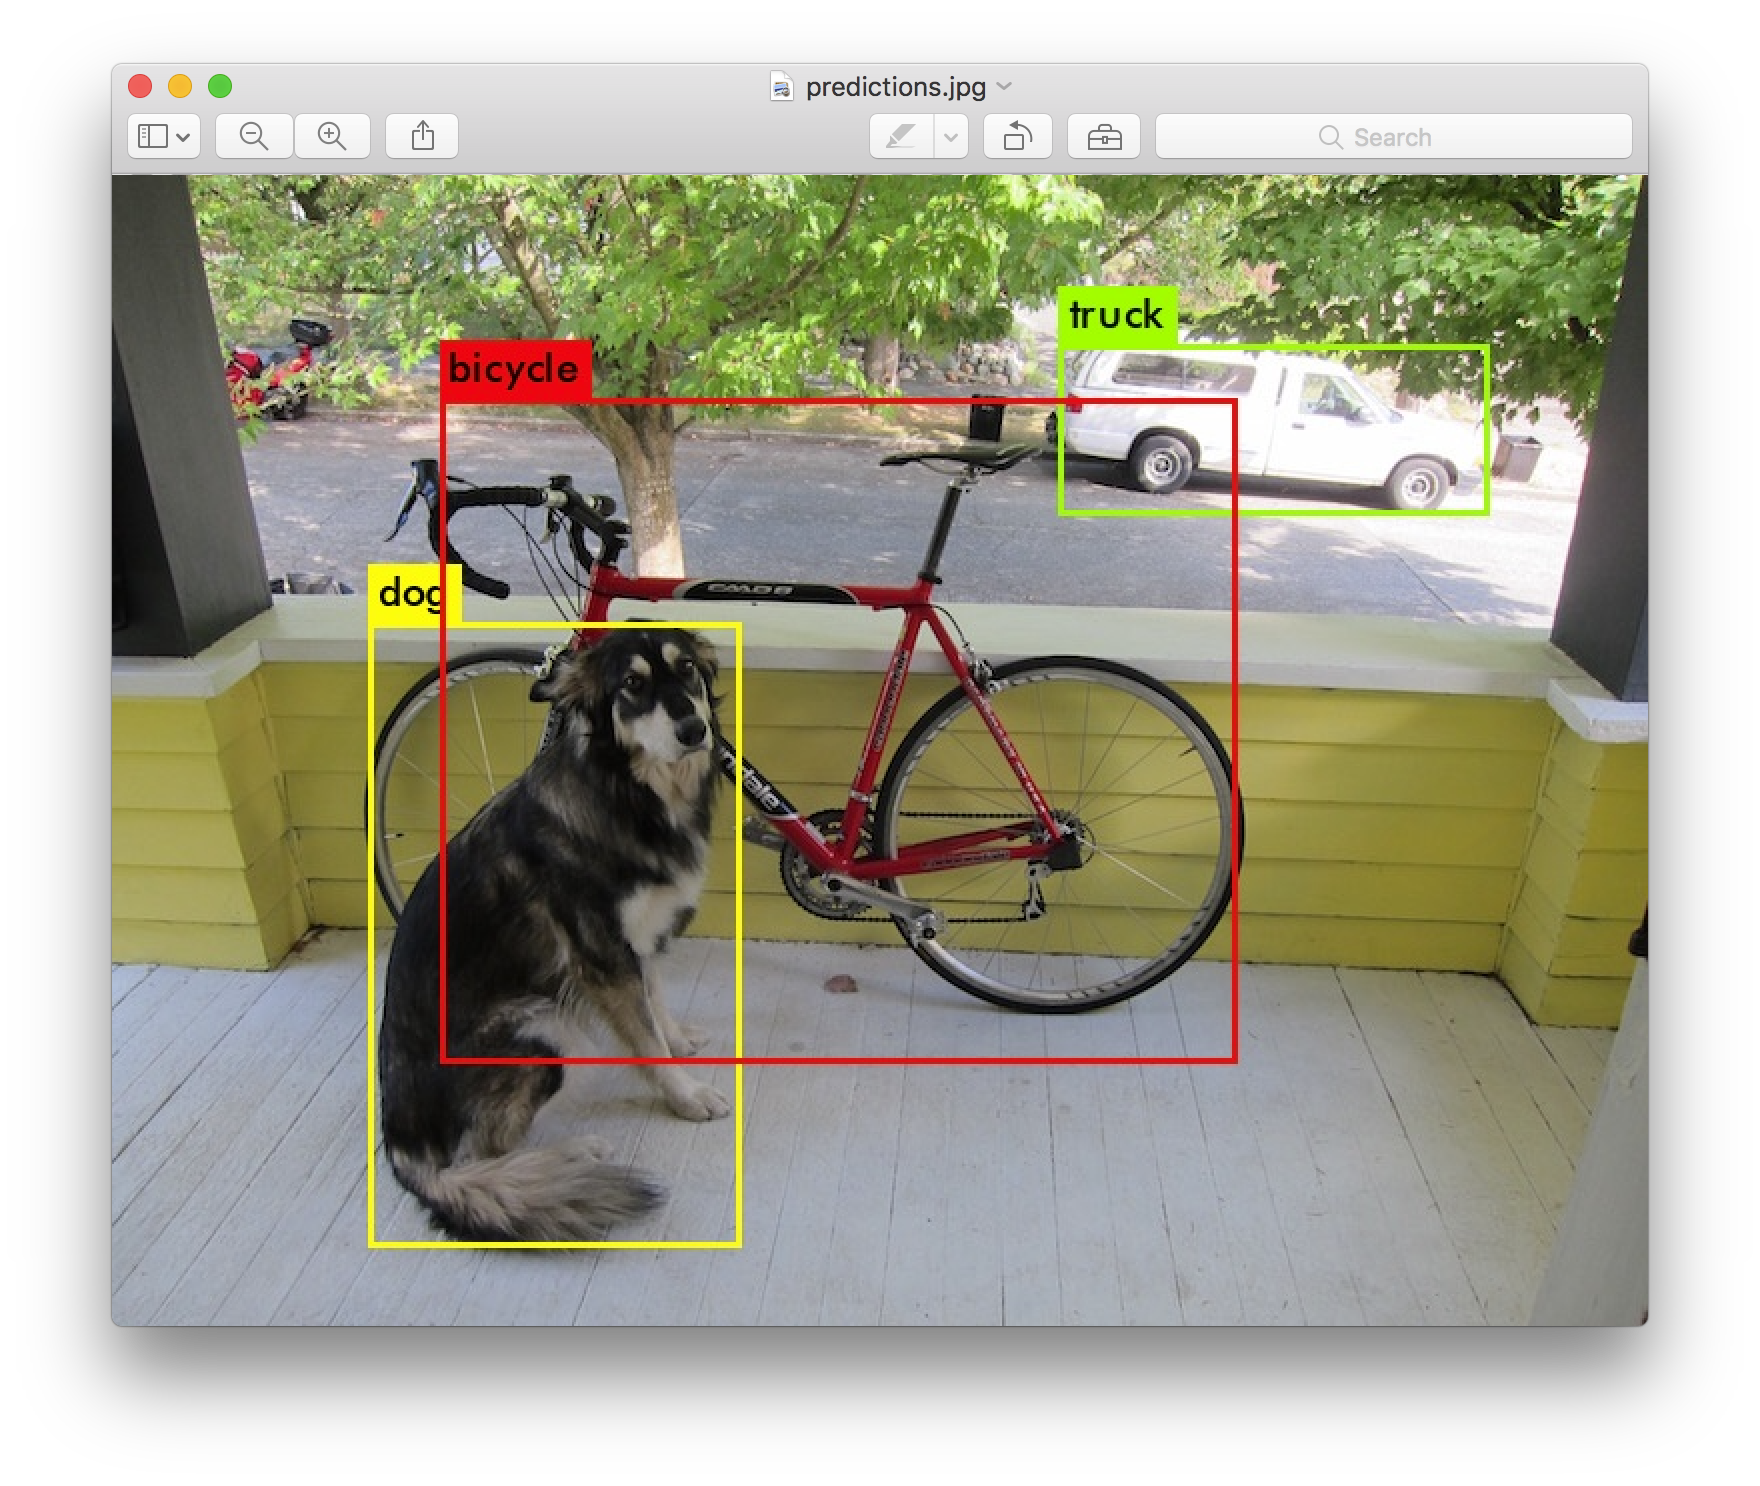
In applications such as autonomous driving, objects are detected and classified the way a human would judge them—as a person, a pet, or a car, for example.
The classification algorithm itself is complex, so I will skip the explanation here, but a quick search turns up a great many sites that describe it.
New versions of YOLO are currently released roughly every other year. We now have YOLO v1 through YOLOv5, and in August 2021 a new version, YOLO X, was announced.
The differences between versions involve substantial changes in the details, but generally speaking accuracy improves with each new release.
Here I will walk through the steps for installing YOLO v5—which offers ample accuracy and, thanks to the wealth of information now available, is easy to set up—and verifying that it works.
Installation environment
OS: Windows 10 (this also worked on macOS Monterey)
Python: 3.9.7 (3.6 or later)
CUDA: 11.3
How to install
Creating a virtual environment
Create a virtual environment using Anaconda.
If you do not have Anaconda installed, install it first.
Installing YOLOv5 pulls in quite a few packages, so I recommend installing it inside a virtual environment.
You can name the environment anything you like; here we will call it “Yolov5_env”.
Enter the following command in Anaconda Prompt.
conda create -n Yolov5_env python=3.9This should create the virtual environment.
Activate it with the following command.
conda activate Yolov5_envInstalling CUDA
First, if this is your first time installing machine learning libraries and you plan to train YOLO on a GPU, install CUDA. (Training on a CPU takes an absurdly long time, so I do not recommend it.)
CUDA can be downloaded from the official site.
As for which CUDA version to use, I suggest checking which CUDA versions PyTorch supports and installing that version.
PyTorch official site
To install an older version, click Download now and then, on the resulting page, use Archive of Previous CUDA Releases under Resources further down the page.
The latest version may well work too, but for now, matching the version PyTorch expects should let you run everything without trouble.
To check whether it is installed on Windows, open “Edit the system environment variables,” go to Advanced > Environment Variables,
and look for a path beginning with CUDA_PATH.
The number after the V indicates the version.
Installing PyTorch
Before installing, update pip.
Activate the virtual environment in Anaconda Prompt and run the following command.
python -m pip install --upgrade pipGo to the PyTorch official site and choose the installation options that match your environment.
One thing to watch out for is the Package field: be sure to select pip here.
Installing with conda will cause errors later on.

Copy and paste the command shown under “Run this Command” to install it into your virtual environment.
Once the installation finishes, use the following command to confirm that PyTorch is installed.
pip listIf torch appears in the list, you are good to go!
As a quick check, start Python and run the following command.
import torch
print(torch.cuda.is_available())
If the output is True, the installation succeeded and torch is ready to run on the GPU.
(On a Mac or a computer without a GPU you will see False, but as long as the import goes through, you are fine.)
If you get an error, go back and review the installation.
Installing YOLOv5
Download (clone) the YOLOv5 files from GitHub.
git clone https://github.com/ultralytics/yolov5If you cannot use the git command, either install git or download the files from the YOLOv5 GitHub repository.
Next, run the following command in your virtual environment in Anaconda Prompt.
cd yolov5
pip install -r requirements.txt
The first command moves you into the yolov5 folder you downloaded from GitHub. If you installed it with the git command, this is all you need; if you downloaded it directly from the website, you will have to navigate to that directory yourself.
The downloaded yolov5 folder contains a file called “requirements.txt” that lists the required packages. The second command opens this file in read-only mode and installs the packages listed in it.
Once the installation is finished, let’s check which packages were installed.
pip list You should see that quite a few packages were installed.
That completes the installation of YOLOv5 for now.
Running It
To check that everything works, let’s try it with the data that comes with the yolov5 folder.
Open Anaconda Prompt, activate the virtual environment, and use the cd command to move to the yolov5 folder.
Then run the following command.
python detect.py --source ./data/images/ --weights yolov5s.pt --conf 0.4detect.py is the program that performs object detection using YOLO.
With source, you specify the path to the folder containing the material you want analyzed.
Here I used the images included in yolov5.

With weights, you choose which model to use.
Here we use yolov5.pt.
conf sets the likelihood threshold at which an object is recognized.
This is a term you will run into often when studying machine learning.
If you are not sure, leaving it as is should be fine.
After running it, you should find the annotated images in runsdetectexp inside the yolov5 folder.
This is how object detection works in YOLOv5.
Errors I Ran Into
・ModuleNotFoundError: No module named ‘torch’
You may see this error when trying to run YOLO.
It means PyTorch is not available, i.e., the module cannot be found.
If you get this error, first check whether torch is installed in your virtual environment.
pip listIf torch is not listed, install PyTorch.
If it is there but things still do not work and you are not sure why, launch python, import PyTorch, and check whether it can actually be used.
import torch
torch.cuda.is_acailable()
If it is usable, True will be returned; if not, you will likely see the error above.
One possible cause of this error is that PyTorch was installed with the conda command.
If PyTorch is installed via conda while the other packages are installed via pip, the error above can occur.
In that case, uninstall torch with the conda command and reinstall it with pip.
Module-not-found problems often come from mixing up whether you installed something with pip or with conda.
Here we use pip throughout, but it is a good habit to always keep track of which command you used to install a package.
Links
Anaconda
CUDA
PyTorch
YOLOv5 GitHub
YOLO homepage
Bonus
For those who aren’t sure which computer to buy, I’ve started offering PC purchase consultations on Coconala!
あなたの要望に合わせてパソコンを選び、提案します パソコン選びに困っている方々へ!様々な目的に対応できます!I often pick out computers and give advice, and many friends have told me I could make money doing PC consultations.
That inspired me to give it a try!
I’ll recommend a machine based on what you plan to use it for and your budget.
In particular, I’ve chosen and used many computers for machine learning.
And if you’d like, I can also advise you on what to look for the next time you buy a computer.
Computers I’ve picked out so far include analysis machines for the lab, everyday machines, PCs for game streaming, PCs for incoming university students, CAD-capable PCs for architecture students, and simple all-purpose machines.
I use both Mac and Windows, so I can discuss and recommend either!
Please give it a try!
![How to Install labelImg [Updated December 2022]](https://www.stg.tankobucreate.com/wp-content/uploads/2021/06/python_cover.png)